THE gingerbread cookies
- Dec 6, 2021
- 3 min read
Ok everyone...I promised I would share this recipe a few days ago and here it is :) These are THE gingerbread cookies! Anyone who knows me or has been to my house around the holidays will always find a batch of these treats ready to be shared. They come in all shapes and sizes as the holiday season progresses - leaves, turkeys, snow flakes, teddy bears and finally the famous and chunky gingerbread boys. Unlike most gingerbread cookies and aside from the rich and spicy gingerbread taste, what makes this recipe stand out is that my cookies are thick and soft instead of thin and crunchy. Among family and friends, they have become affectionally known as "ginger crack" because that's just how good they are!
I cannot claim credit for this recipe, however. It has been handed down from my mom and from her friend before her. The spirit of friendship and holiday cheer is one of my favorite parts of sharing this recipe with others.
One thing to keep in mind when making gingerbread cookies is that it is a multi-day process for them to turn out right. So if you have a party or event coming up, make sure to start a few days in advance.
DAY ONE: Make the Dough
Mix all dry ingredients in a bowl and set aside. *If you want to double the recipe, make the dough twice! It is really hard to mix all the ingredients properly if you try to do a double recipe all at once.*
5 cups all-purpose unbleached flour
1 1/2 teaspoons baking soda
2 1/2 teaspoons ground ginger
1 1/2 teaspoons ground cinnamon
1 1/2 teaspoons ground cloves
1/2 teaspoon salt
In a larger mixing bowl, beat shortening for 30 seconds. Add sugar and beat until fluffy. Add egg, molasses, and vinegar and beat until mixture is smooth.
1 cup shortening or butter
1 cup sugar
1 egg
1 cup Grandma's Molasses
2 tablespoons white vinegar
Add dry ingredients to beaten mixture. Beat with hand mixer just until the flour is mixed in and then kneed the dough with hands to get the right consistency. Dough should not be dry or sticky.
Divide dough into thirds and roll into flattened balls. Wrap each ball with cling or press and seal wrap and chill dough overnight.
DAY TWO: Roll & Bake the Dough
Preheat oven to 375 degrees.
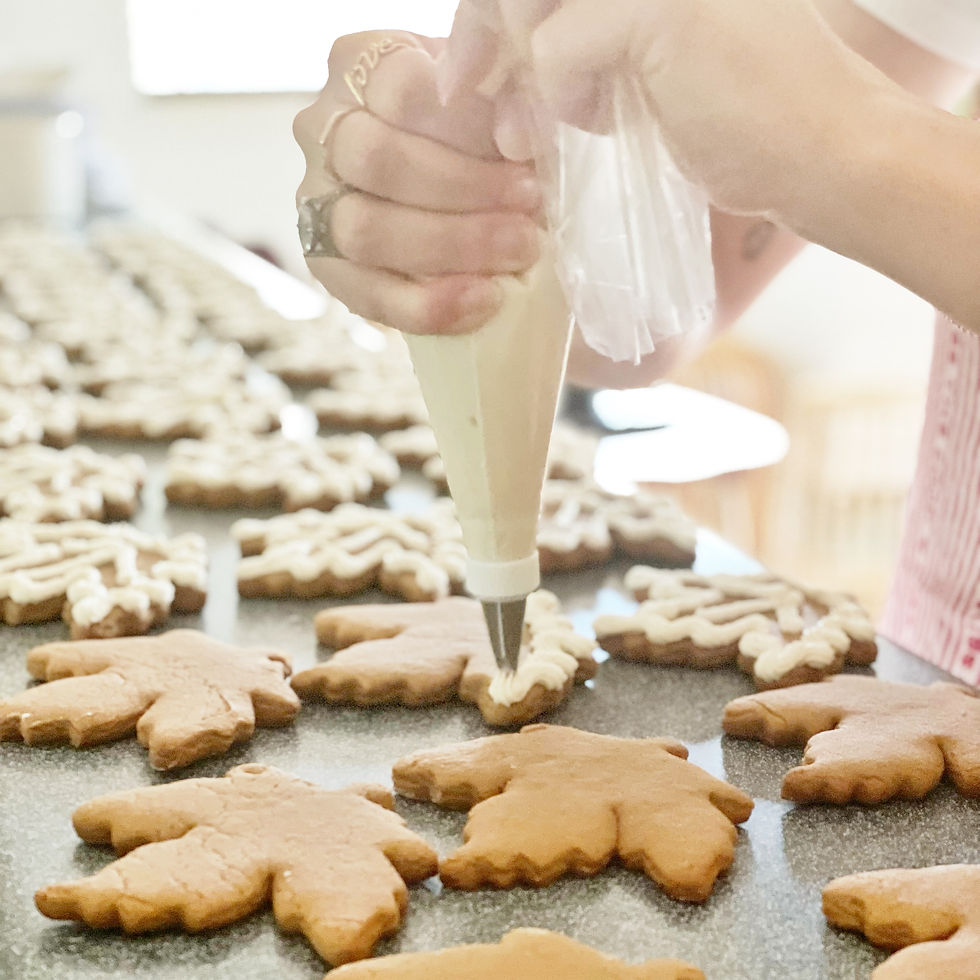
Remove dough from fridge and kneed thirds separately until room temperature. On a lightly floured surface, roll out each 1/3 of dough until it is 1/4 inch thick. Cut into desired shapes and place on silicone mat lined cookie sheets. Leave at least 1 inch of space between cookies on sheet for expansion during baking. Bake for 5 to 6 minutes. Remove after one minute from cookie sheet and let cool on wire baking racks. Ice once at room temperature or stack and seal in tupperware until ready to ice.
DAY TWO - PART 2 OR DAY THREE: Ice the Cookies
My favorite icing recipe can be found on the back of the C & H powdered sugar bag.
In a large bowl, with electric hand mixer at low speed, combine sugar, butter, and vanilla. Add milk slowly, until the frosting is creamy but on the thick side (you will not use all of the milk) - this will make the frosting hold shape better during icing.
3 3/4 cups C&H® Confectioners Sugar
1/2 cup (1 stick) butter, softened
3 to 4 tablespoons milk
1 teaspoon vanilla extract

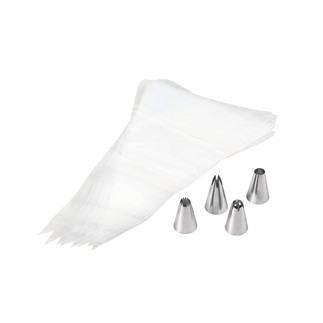
To ice the cookies, I use the wilton size 1M icing tip with the Ateco reusable coupler and disposable icing bags. This setup works flawlessly every time and helps the icing to cookie ratio be spot on.
*To store iced cookies, stack in tupperware with parchment paper between each layer.*
I hope this step by step instruction will help you successfully make these delicious cookies. If you have any further questions, feel free to contact me for more tips or directions :)


Comments